Perplexed by the shock of getting cold water instead of hot water? But you were sure your heater was working as your pilot light was on.
Don’t worry this is a common phenomenon.
Why is your pilot light lit but no hot water?
It’s probably because your heat sensor is faulty or your gas valve wasn’t on. Few other factors such as a faulty thermocouple or sediment buildup play a role. Each of these problems can be easily solved.
Interested to know more? We’ve put together a guide to help you fix this problem.
So let’s get to it!
Why Is Your Heater Not Heating Water
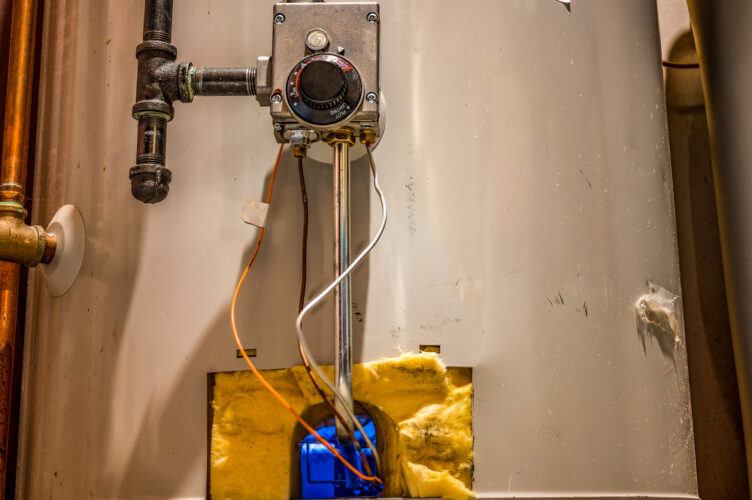
The reason behind your heater not heating water lies in the combustion process. The key players in this are the pilot light, thermocouple/thermopile, main burner, and gas valve.

The pilot flame burns the thermocouple up to the triggering temperature. This in turn signals the main burner to start.
It is inefficient to add water to a heating system like this, compared to a geothermal loop. Conventional heating systems like these are also inexpensive.
Forgetting To Turn The Knob
Forgetting to turn on the gas valve from pilot to on is a common culprit. This might be why there is no hot water despite the pilot light being on.
Keeping the gas knob on the pilot only shows you if the pilot flame is functional. It doesn’t turn on the gas line for the main burner.
Solution: Turning On the Knob
After you establish that you have forgotten to turn on the gas connection. Simply test the pilot light before, then turn the knob to “on”.
This will allow a gas connection to the main burner causing the water to heat.
Faulty Thermopile/Thermocouple
The Pilot flame ignites the main burner by heating up the thermocouple. After the thermocouple heats up, it runs a triggering voltage through it. This in turn opens up the main burner’s connection.
Conventional Gas Burners use a thermocouple, while electric ones use a thermopile. A thermopile is a bundle of thermocouples joined together.
Having a faulty thermocouple/thermopile may hinder the ignition of the main burner. This may be why your propane-fueled heater struggles to stay alight.

Solution: Thermocouple/Thermopile Troubleshooting
Before taking it apart and troubleshooting your heater, you’ll need these tools.
Things you’ll need:
- Adjustable wrench
- Screwdriver
- Dish Soap
- A Small Brush
- Alligator Test Leads
- Multimeter
If you’re unsure about which multimeter to choose, take a look at our picks below:
| Digital Multimeter for Voltage, Resistance, Current, Continuity, Battery | Check Current Price |
| Crenova MS8233D Auto-Ranging Digital Multimeter Voltmeter Ohm Volt Amp | Check Current Price |
Now that you have your tools, let’s get started.
Step 1: Voltage Test
First, remove the bottom cover. After that, set the multimeter to Volts-DC. Remove the thermocouple from the control valve with a tool wrench.
Next, attach the probes to the copper endings of the thermocouple. In the case of a thermopile disconnect the wires leading to the control valve. Then connect the probes to each connector.
Then, light the pilot and hold down the button. For the thermocouple, the voltage should read between 20-30 millivolts. For the thermopile, it should be 400-850 millivolts.
Anything under these ranges, the pilot light will have trouble being lit.
Step 2: Disconnect The Heater
Turn off the main gas supply. Wait for everything to cool down before turning the control knob to the off position.
Step 3: Take Out Burner Assembly
Remove the ignitor wire. For the thermopile, remove the two wires leading to the control valve. For the thermocouple, remove the wires from the thermal switch.
Remove the two screws that hold the burner in place, using a screwdriver. Unscrew the thermocouple, pilot tube, and manifold tube. Then, slide out the assembly.
Step 4: Take Out And Replace Thermopile/Thermocouple
To access the thermopile/thermocouple, remove the component block/plug holding it. Remove the pilot assembly and shield from the burner using a screwdriver.
Thermopiles and Thermocouples have differences. So they require different approaches to reattach.
Push the wires out of the manifold door. Then, free the thermocouple from the plug. For the thermopile loosen the clip that holds it in place.
Replace the thermopile/thermocouple with a new one. And push it into place for the thermocouple. For the thermopile, push down on the clip until it clicks.
Next, snap the thermocouple/thermopile into the door plug. Then, feed the ignitor tube, thermocouple/thermopile, and pilot-tube through the manifold doors.
Afterward, align the pilot assembly to the burner and screw it into place.
Step 5: Burner Re-installation
Fit the burner assembly into the tab and slide it into the bracket. Next, align the manifold tube into the control valve and adjust with a wrench. Screw the thermocouple/thermopile and fit the pilot tube with the wrench.
Then, tighten the door screws and reconnect the wires to the thermal cutoff switch. Finish off by connecting the ignitor wire.
Don’t forget to turn on the heater and see if it’s working. While it’s running apply a soap solution to the pilot and manifold fittings. If there are bubbles then there’s a leak.
The process differs if you set your heater horizontally or vertically. We’ve provided solutions for a vertically set heater.
Remove the pilot assembly and shield from the burner using a screwdriver.
Buildup Of Sediment

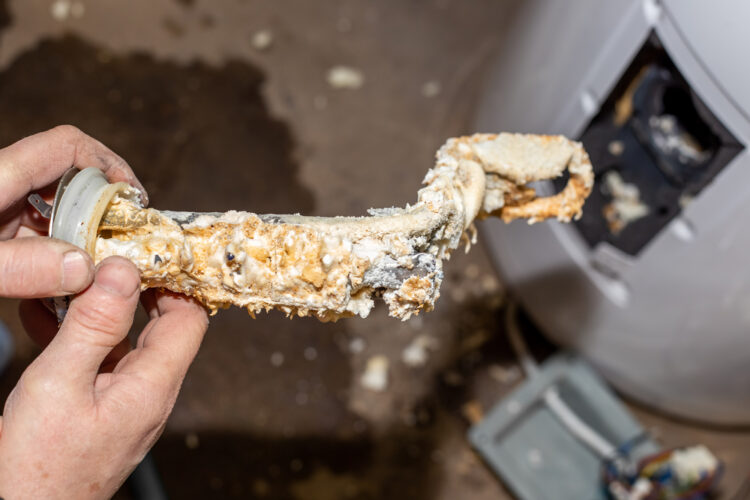
Naturally occurring minerals such as calcium and magnesium gradually build up in the tank. This sediment buildup acts as an insulating blanket for the heater.
This results in the water not heating as efficiently as before. In some extreme cases, the heating mechanism stops working.
Solution: Drain using Drain-Valve
The steps needed to do drain the sediment are described below-
Step 1: Prepare To Drain
Turn the gas pilot to the “pilot” setting. Turn the shut-off valve to turn off the supply of cold water.
Turn on the nearest hot water connection, to let out the hot water.
Step 2: Drain The Tank
Connect the drain valve to a garden hose. Make sure the hose’s end is pointing towards a sink.
By opening the drain valve, you can allow the water to flush out of the tank. You’ll probably see discoloration in the draining water as the particles flush out.
In extreme circumstances, you may need to refill the tank with freshwater. Drain it again to eliminate all sediments.
Step 3: Test-Run
Open the cold water supply when you’ve successfully drained the tank. The tank will be refilled as a result of this.
After that, turn the gas control valve to “on.”. Next, ensure that the gas burner starts properly.
To summarize, this is how you assure a constant supply of hot water in your home.
FAQs
Question: What sets the reset button on the water heater off?
Answer: When the temperature reaches an excess of 180 degrees Fahrenheit, it sets off.
Question: How do I check whether or not the thermostat in my water heater is faulty?
Answer: If you switch on the hot water faucet and only cold water comes out, the top thermostat is broken. However, if the water is hot and then cools, you have a faulty lower thermostat.
Question: What is the estimated time for your water to heat after a rest?
Answer: It may take between 12 and 24 hours for your water heater to regain regular performance once it has been reset.
Conclusion
Now you know why your pilot light lit but no hot water supply. Hopefully, you’ve realized how to properly join PVC pipes without an adhesive.
Till then, stay safe and good luck!