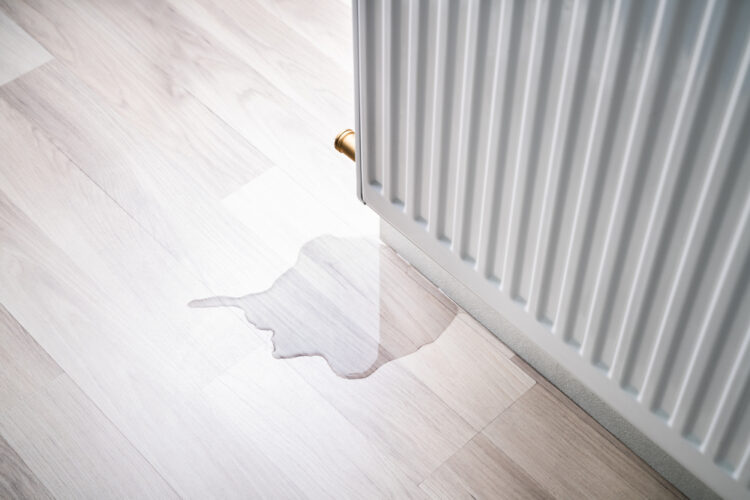
If you have wood floors in your home, water leaks can cause significant damage.
It may take some time to dry your wooden floor completely, which can leave behind stains.
Using usual cleaning methods, you may need effective solutions as they are difficult to remove.
How to dry a wet wood floor?
To dry the wet floor, remove all the damp floor accessories. After that, mop all the water for visible cleaning. You can use a wet-dry vacuum for deep drying. Make sure to disinfect your floor. Lastly, check the moisture level of your wood floor.
In the article, all the procedures are described widely. To know more, I hope you’ll stick around!
What Signs Point to Water Damage

Wooden floors are highly susceptible to distortion due to moisture in the air. It’s easy to spot water damage after knowing what to look for.
You may be tempted to look for a large red puddle as evidence of water damage. But this is not the only type of damage that can occur.
Ensure your wood floor is free of staining, mold, or mildew by inspecting it and smelling it. A musty smell is an excellent way to tell if there is any moisture in dark woods, but it isn’t foolproof.
If you don’t want to risk a complete sanding job, you’ll need to look deeper and begin drying the surface. Here I’ve given some simple solutions to ease your hassle.
Drying Hardwood Floors: 8 Easy Steps

After discovering water damage, you should dry your wood flooring as quickly as possible. To dry hardwood flooring, you’ll need a proper drying process.
Here are eight step-by-step procedures for drying wet wood flooring-
Step 1: Remove All Electronics from the Space
It’s essential to shut down any devices or electronics nearby. Do it immediately when dealing with a damaged wood floor attached to the wall.
Using water and electricity together is a big no! The same goes for any wall adaptors or electrical connections in an excellent area.
Additionally, you must immediately remove all wet carpeting, furniture, and rugs to avoid electrical shocks and fires.
Step 2: Remove All Carpets And Rugs
Your wood floor’s slab won’t dry if the wood remains wet. So, if you have wet rugs, floor coverings, or carpeting on your wood flooring, you must remove it immediately.
The wooden floor can get wet through spilt water on the carpet. In that case, remove spilt water from the carpet first. Relocate all the furniture to dry areas before removing drenched rugs or mats from the site.
You must remove soaked items from the house if the floor is wet. You can leave them out to dry in the sunshine during your time on the floor.
You may not get them cleaned immediately for any reason. Then you may have to throw out your carpets and rugs after they’ve been drenched and beyond repair.
Step 3: Mop All the Water Up
Soak all the water with a mesh towel and squeegee. Mop up the water thoroughly and clean the visible water from the wooden floor.
Step 4: A Wet-Dry Vacuum Can Help You
A wet-dry vacuum is the best option to remove the visible water from water-soaked items and wood floors. It can quickly remove water silt trapped in the wood’s pores.
You can use the vacuum system for drying out your laminating floor too. It’d make your laminate floor less slippery.
Step 5: Scrub the Surface Carefully
Scrubbing comes in second when it comes to drying your wood floors thoroughly. You should use a light scrubbing motion and work with the wood floor’s grain.
Don’t scrub too hard, as it can cause permanent damage. Use a non-sudsy cleaning solution or a baking soda to clean the floor.
Disinfecting your floor while scrubbing is vital to prevent mold growth. Here are some disinfected products to clean the wet wood floors that you can use:
| Product 1 | |
| Product 2 |
Use these products by wearing rubber gloves. They will protect your hand from chemical burning.
Step 6: Remove Damp Boards
To speed up the drying process of your wood flooring, remove the damp boards. Set them aside until they are dry before reinstalling them.
Replace them as soon as they are scorched. It helps to avoid warping or other long-term damage to the wood.
Step 7: Make Use of Fans to Circulate the Air
Use large fans to move the air around your house. It is a great way to speed up the drying process for your wood floors. To dry faster, you can use table fans or heavy-duty fans.
Step 8: Use Moisture Testing Meter
Make sure your wood flooring is completely dry before moving on to the next step. Use a “moisture testing meter” to determine how much water is trapped inside the wood fibers.
Just like moisture helps to grow mold in the bathroom ceiling, it can cause mold growth on the floor too. Hence, this is a must-needed procedure. If the moisture content is less than 5%, your wooden floor is considered well-conditioned. You should collect the meter as it’s convenient for this sudden incident.
These simple steps will allow you to dry your wood floor quickly and effectively. They are comparatively less time-consuming and advantageous.
FAQs
How long does it take to grow mold to wet wood floors?
Answer: The mold can begin to grow in the 48-72 hours after your wood floors become wet.
What time does it take to dry a wet floor?
Answer: The drying time of a wet floor is 30 minutes to 1 hour. It depends on the size and temperature of the room. It also depends on how much moisture was left behind after cleaning and the room temperature.
Is baking soda capable of absorbing moisture from wood?
Answer: Yes, baking soda can absorb moisture from the wood. Generously drizzle baking soda inside the wood floor to absorb the water if the wood floor is damp.
Conclusion
This is where I’ll say my goodbye. Now I believe that you have better solutions for how to dry wet wood floors.
I hope these easy tips will help you protect your wood floor from growing molds and stains.
Call professionals if you face severe problems.
My best wishes for quick resolutions!